이제 지난번에 만든 기본 화면에 애드몹을 연동 하여 하단 배너광고를 노출해 보자
1. 애드몹 앱 생성 및 광고 추가.
애드몹 아이디가 없다면 우선 애드몹 가입을 하자
https://admob.google.com/intl/ko/home/
Google AdMob: 모바일 앱 수익 창출
인앱 광고를 사용하여 모바일 앱에서 더 많은 수익을 창출하고, 사용이 간편한 도구를 통해 유용한 분석 정보를 얻고 앱을 성장시켜 보세요.
admob.google.com
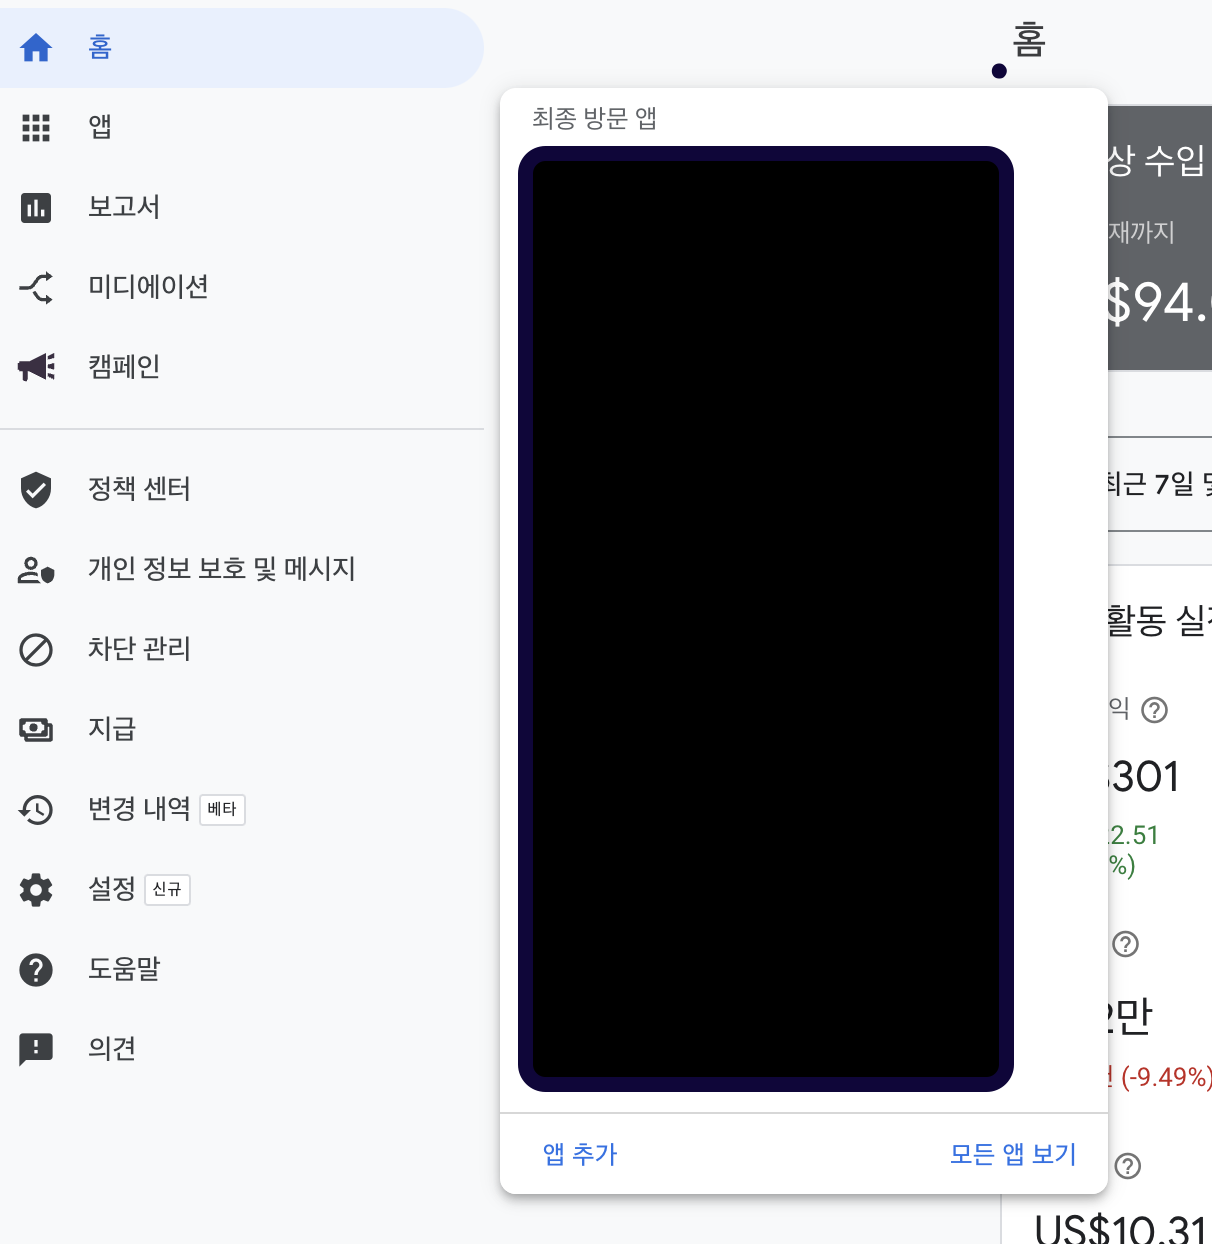
가입 후 애드몹 대쉬보드에서 좌측의 앱 -> 앱 추가를 선택한다.
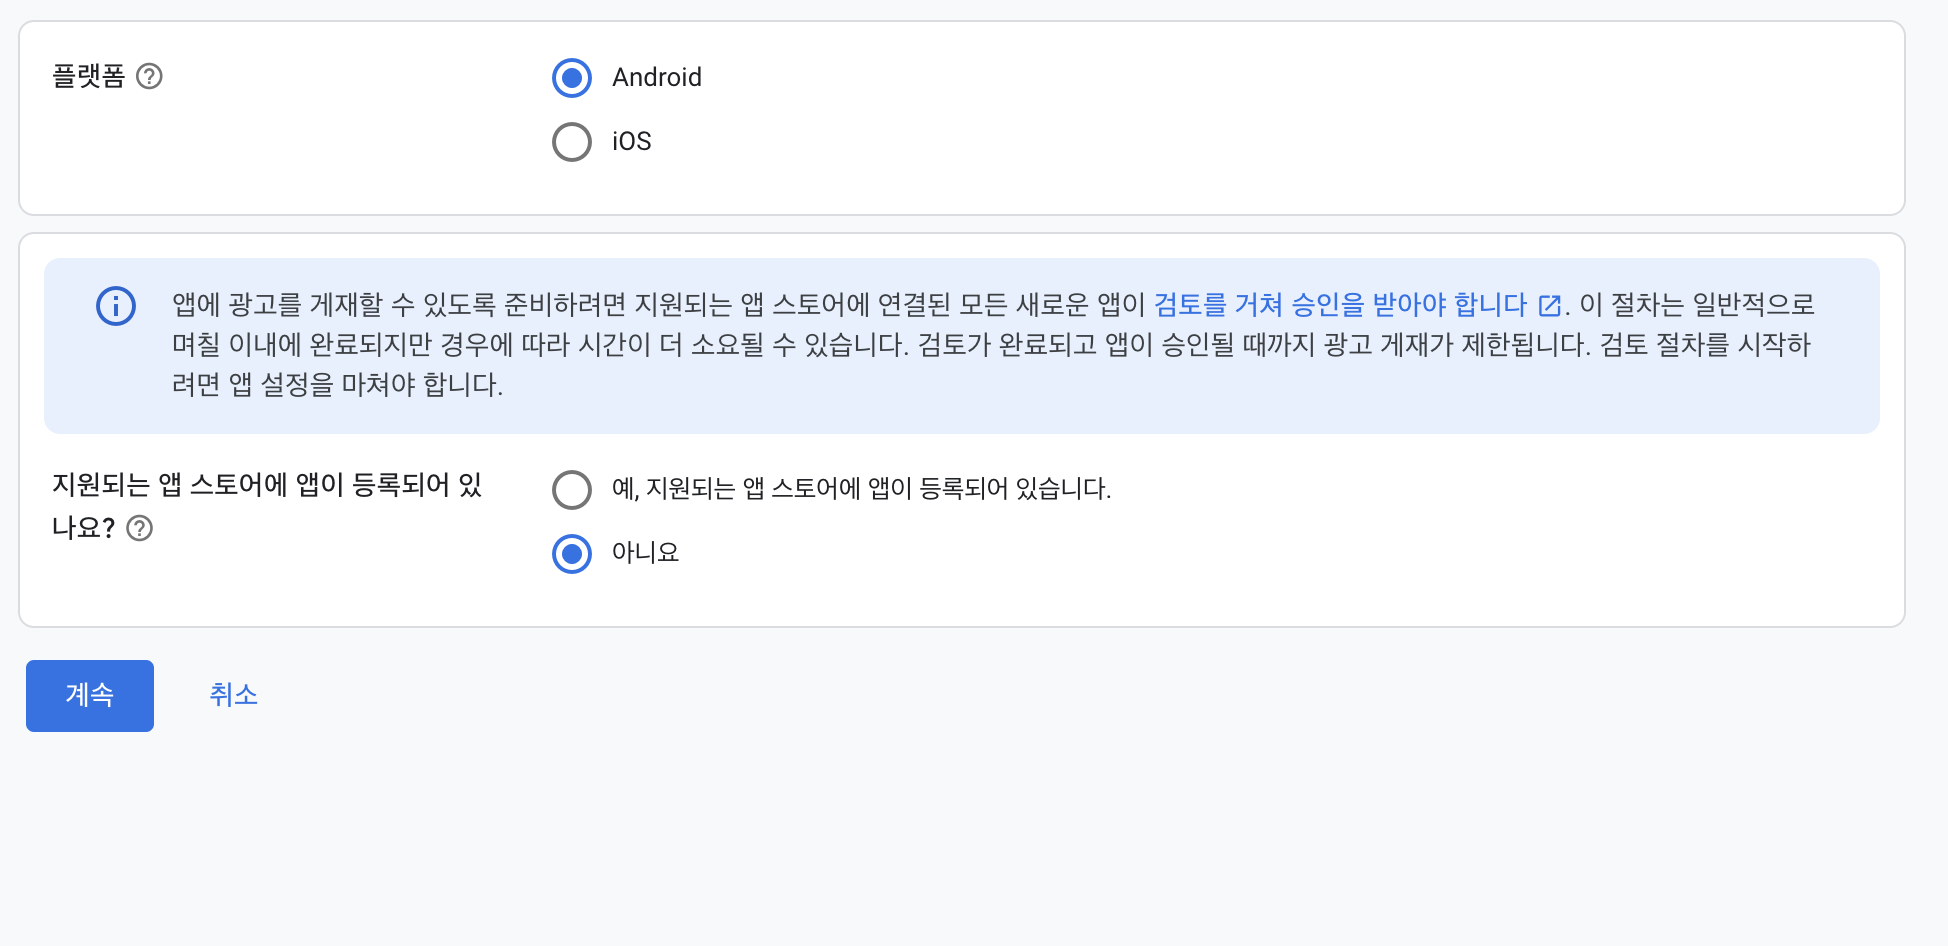
그 후 Android -> 아니오 선택 후 계속
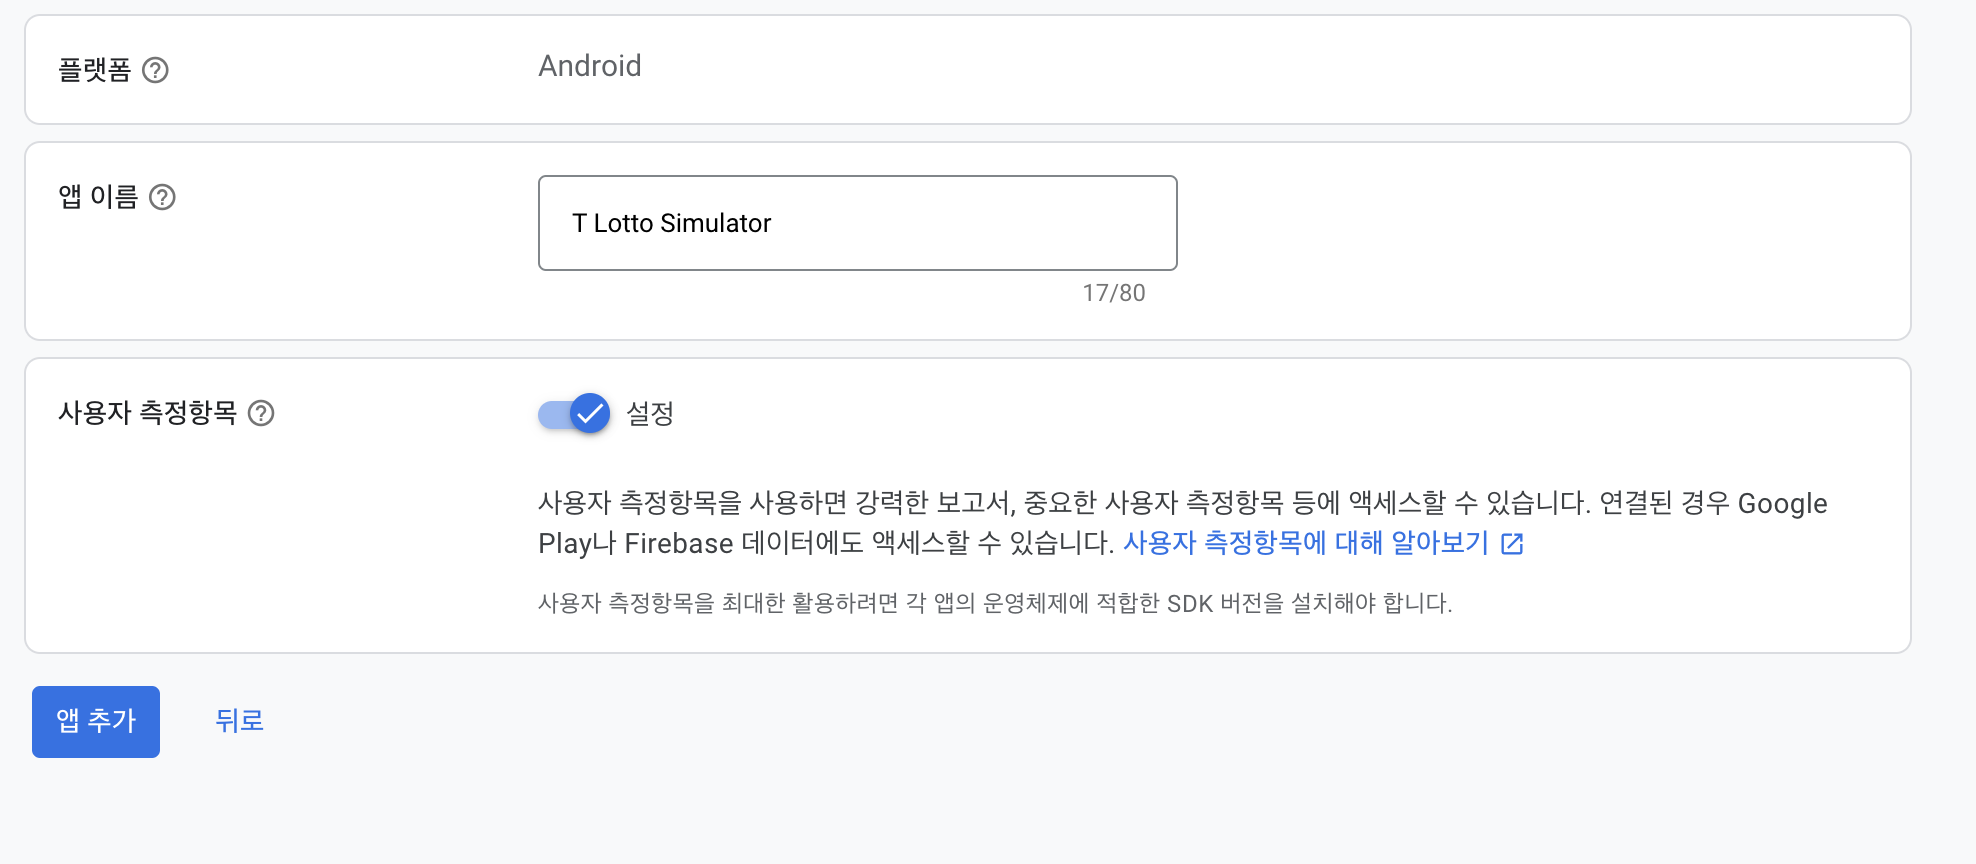
앱 이름 입력 후 앱 추가 -> 앱 추가 완료 창에서 완료
- 앱 추가가 완료되면 해당 앱 개요로 이동된다.
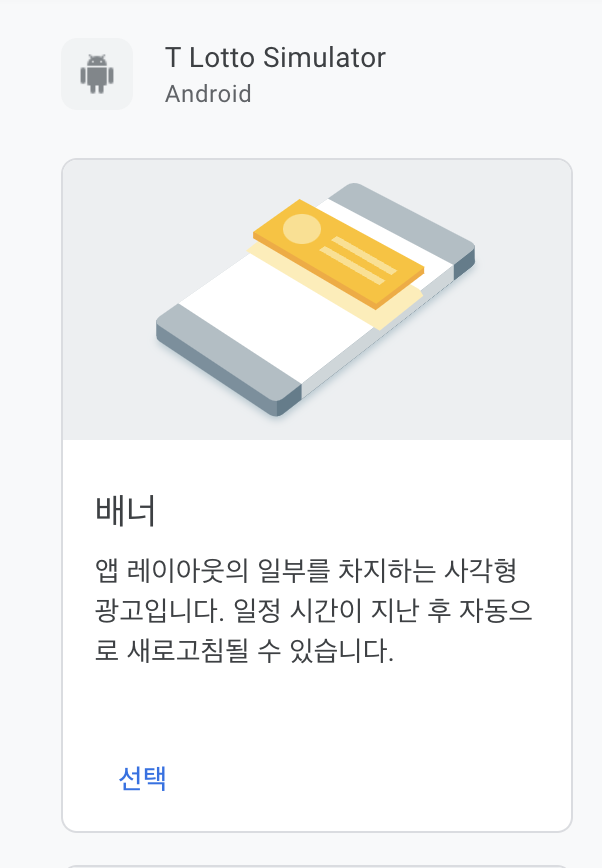
이동된 앱 개요에서 좌측에 광고단위 -> 광고단위 추가 -> 배너 -> 광고단위 이름입력 -> 광고단위만들기 -> 완료 순으로 진행한다
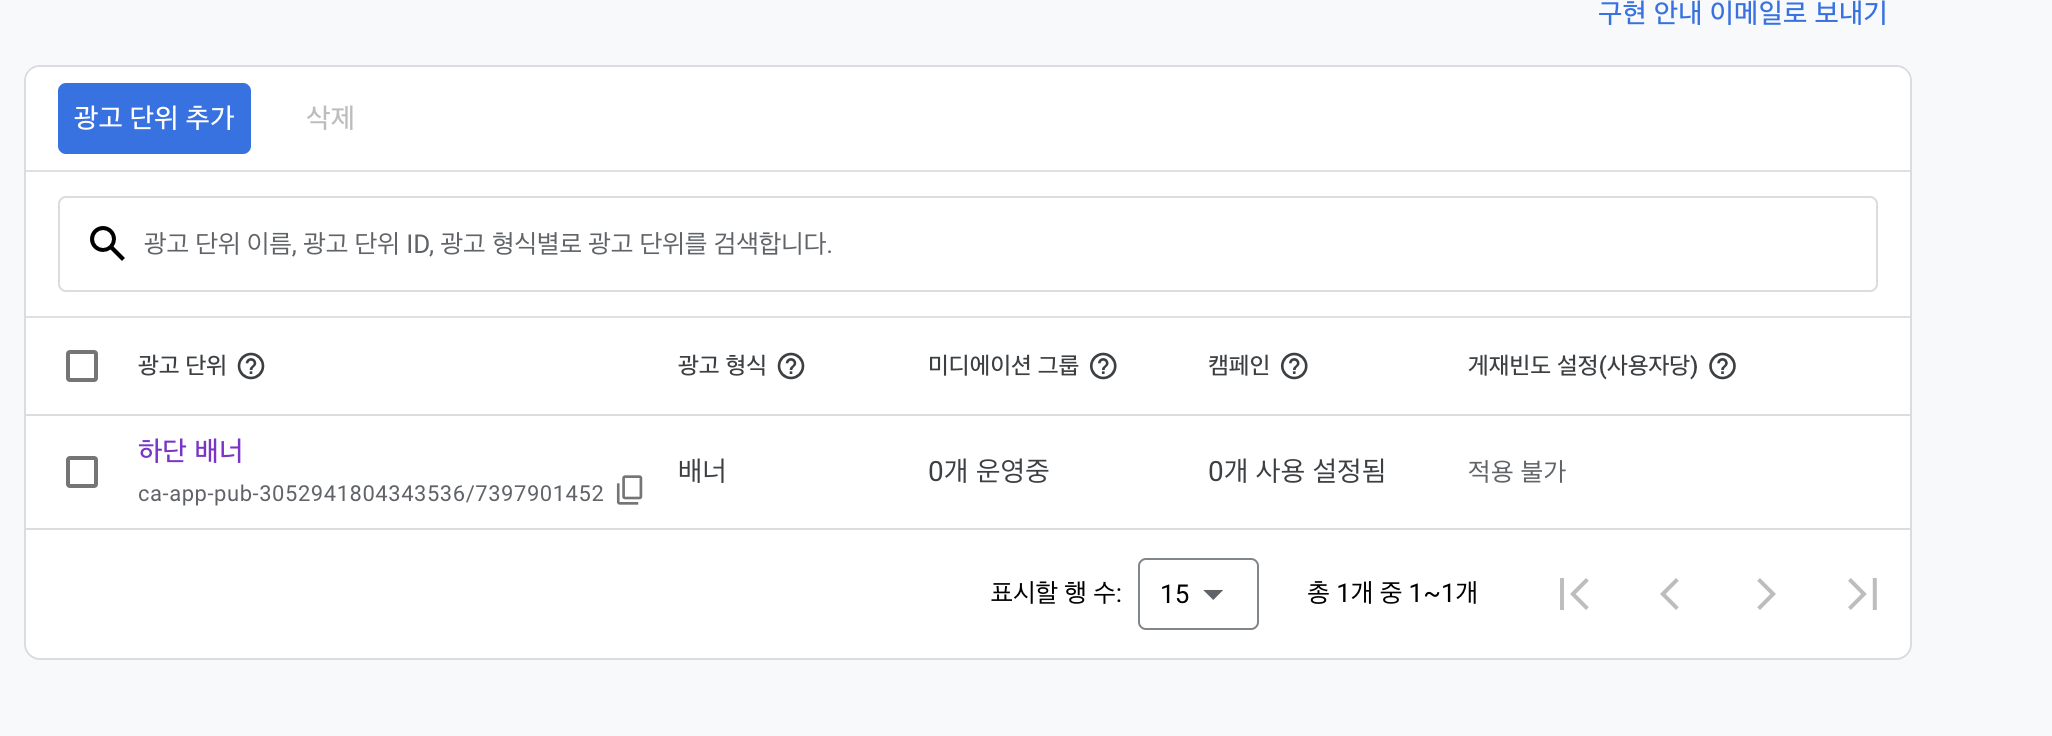
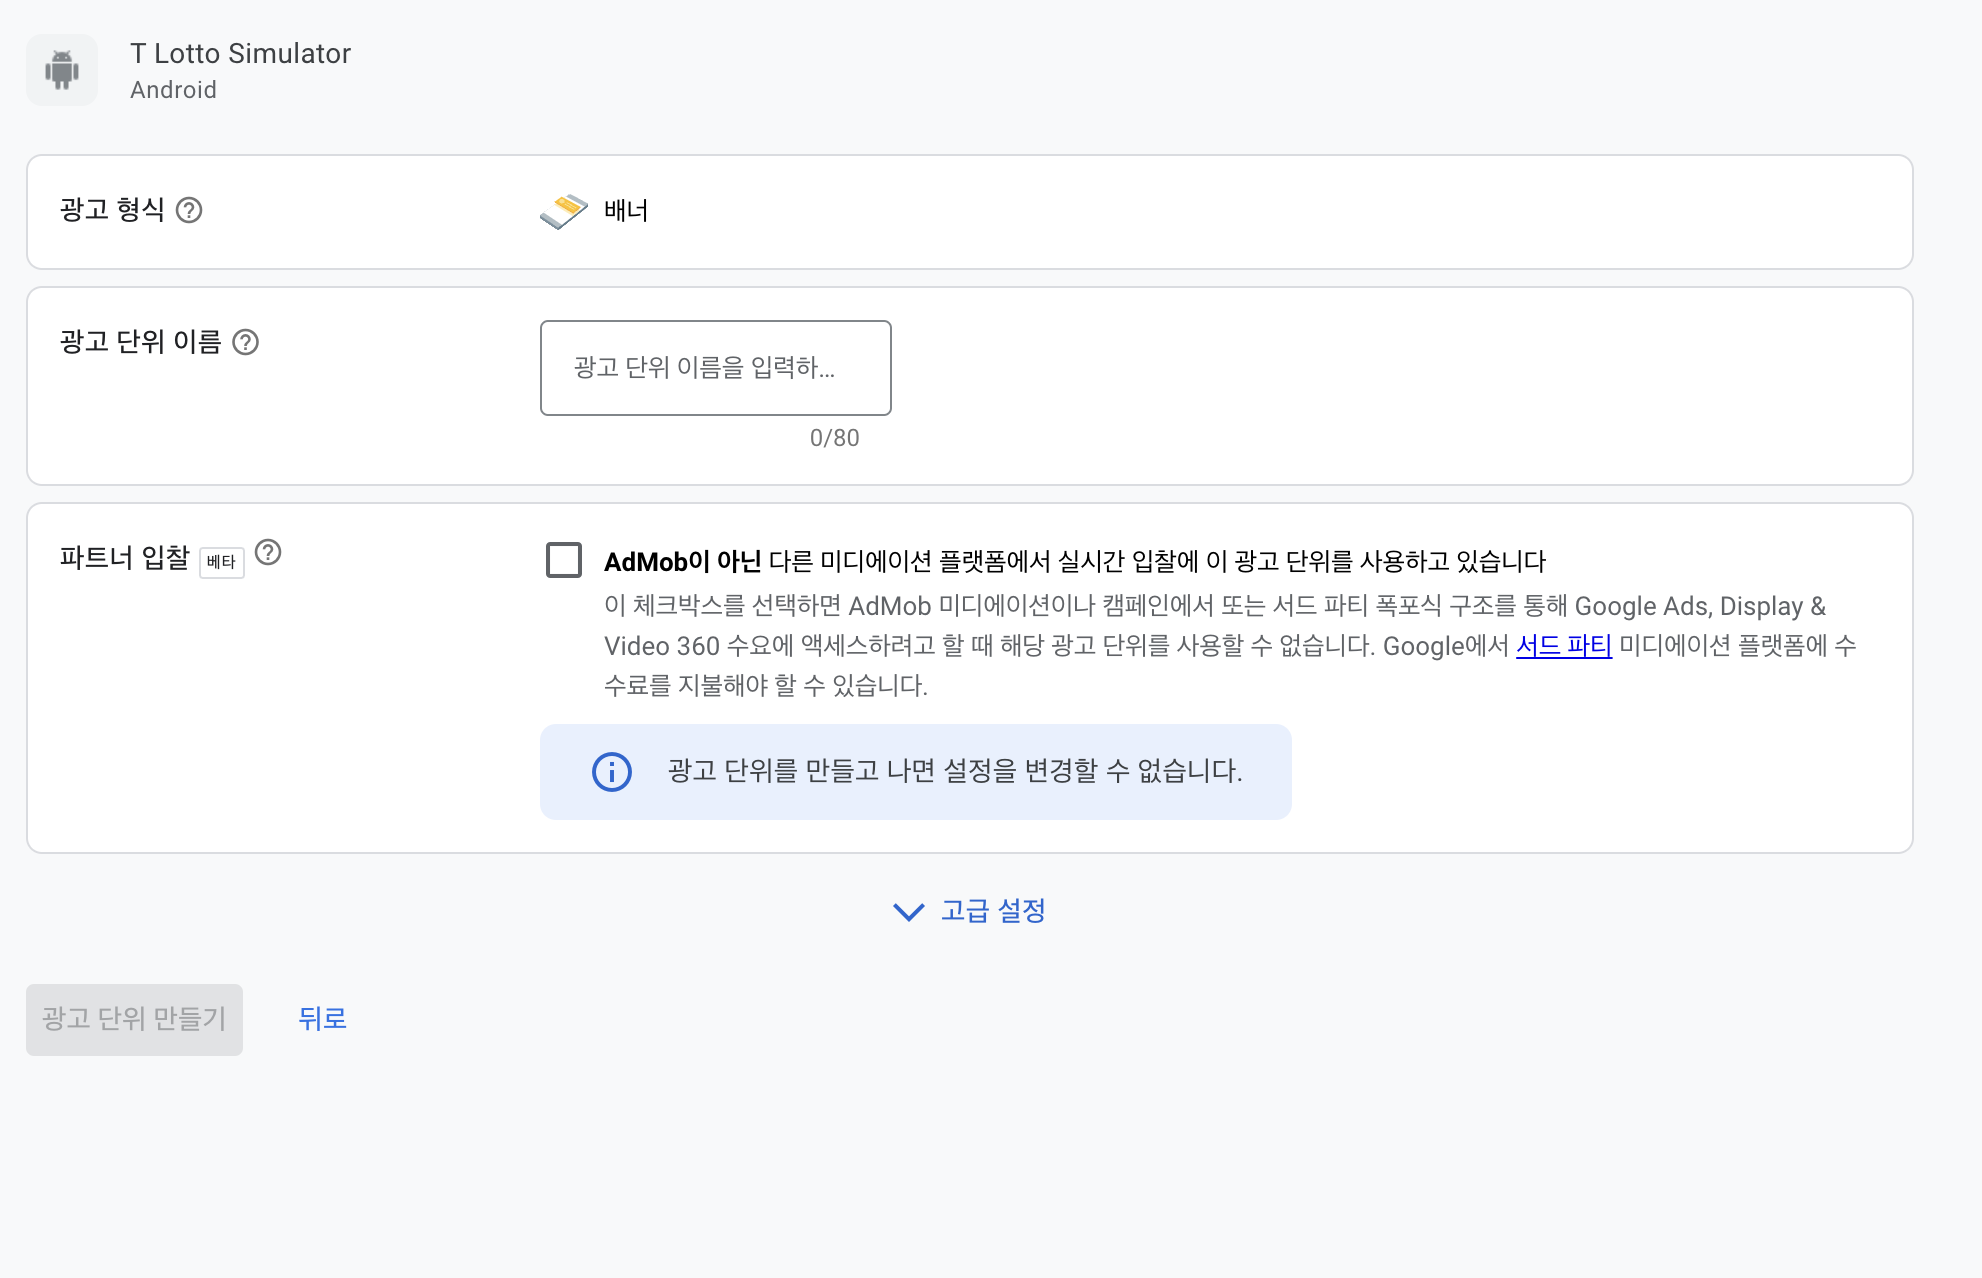

ps. 마지막 완료 화면에 나온 1번 앱 id와 2번 광고단위 아이디는 본인 만의 광고 아이디 이기 때문에 보안에 신경 쓰자
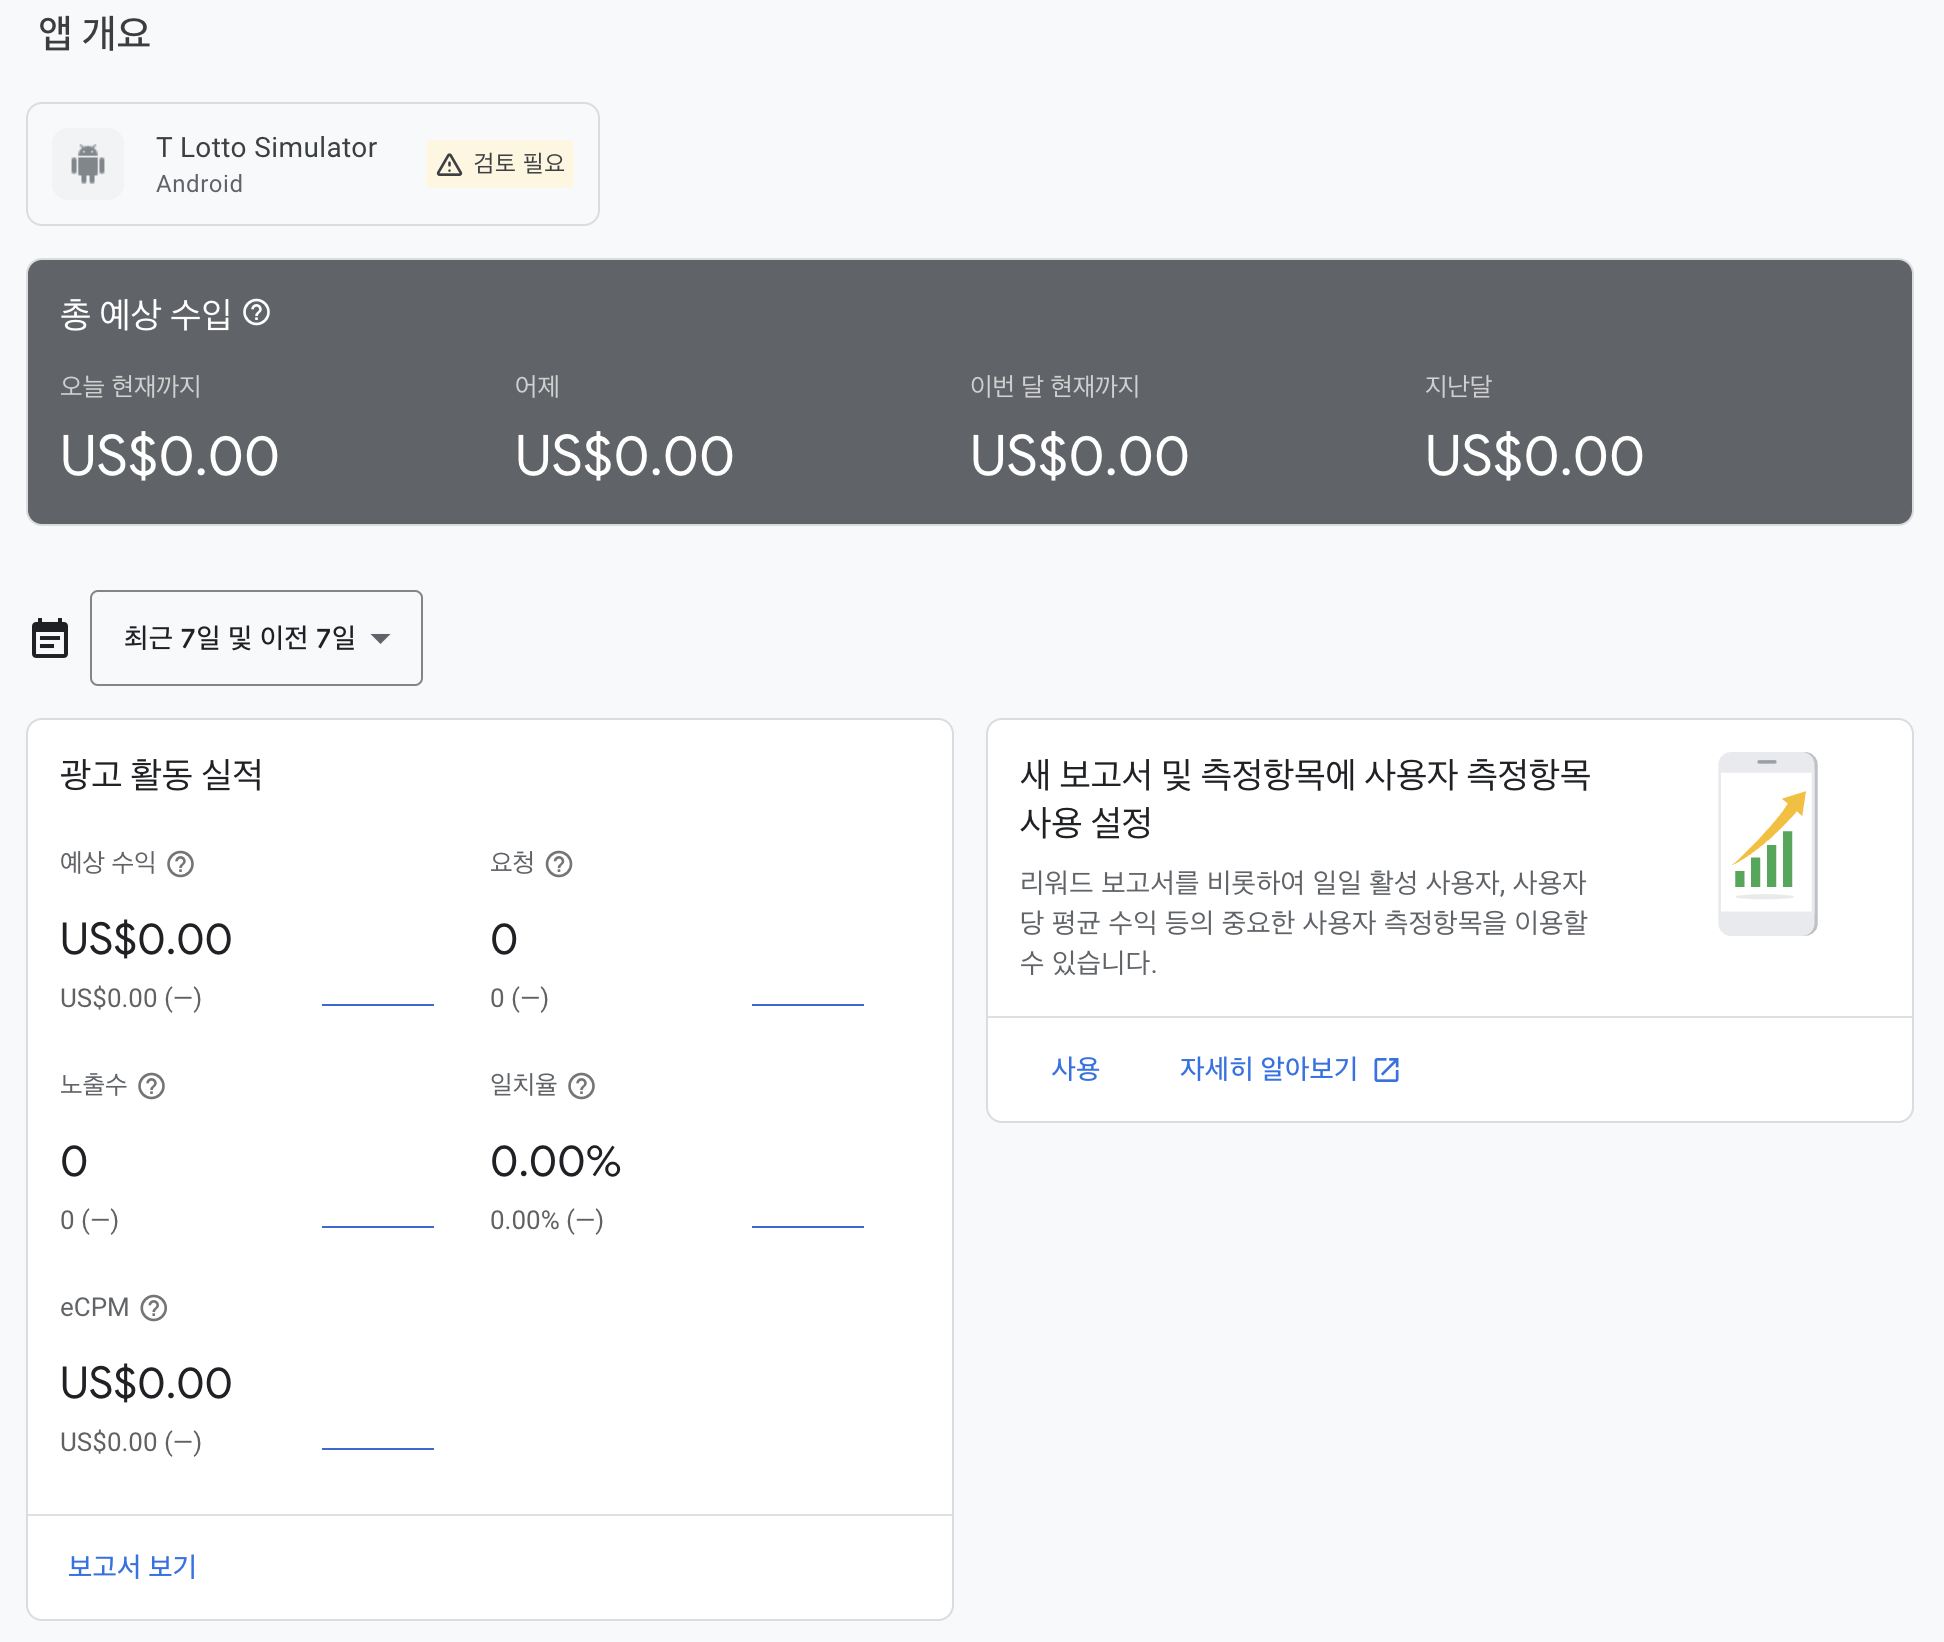
광고 추가가 정상적으로 완료 되면 애드몹 앱 개요가 아래처럼 바뀐것을 볼 수 있다.
2. 앱에 애드몹 의존성 추가
- build.gradle(Module) 수정
dependencies에 애드몹 의존성을 추가해주자
implementation 'com.google.android.gms:play-services-ads:22.3.0'
추가 후 상단에 Sync 가 나오면 꼭 눌러준다.
- AndroidManifest.xml 수정
애드몹은 인터넷이 되야 광고를 불러오기 때문에 인터넷 권한이 필요한 아래 코드가 추가 되어야 한다.
<!-- Include required permissions for Google Mobile Ads to run. -->
<uses-permission android:name="android.permission.INTERNET" />
<uses-permission android:name="android.permission.ACCESS_NETWORK_STATE" />
그 후 앱에서 애드몹을 사용하기 위해 애드몹에 광고 추가로 만들었던 마지막 완료 화면에 나온 1번 앱 id를 지정해 주어야 한다.
<meta-data
    android:name="com.google.android.gms.ads.APPLICATION_ID"
    android:value="광고 추가후 나온 1번 앱 아이디" />
위 두개가 모두 추가된 AndroidManifest.xml 파일은 아래와 같다.
<?xml version="1.0" encoding="utf-8"?>
<manifest xmlns:android="http://schemas.android.com/apk/res/android"
    xmlns:tools="http://schemas.android.com/tools"
    package="com.niee.lottosimulator">

    <!-- Include required permissions for Google Mobile Ads to run. -->
    <uses-permission android:name="android.permission.INTERNET" />
    <uses-permission android:name="android.permission.ACCESS_NETWORK_STATE" />

    <application
        android:allowBackup="true"
        android:dataExtractionRules="@xml/data_extraction_rules"
        android:fullBackupContent="@xml/backup_rules"
        android:icon="@mipmap/ic_launcher"
        android:label="@string/app_name"
        android:roundIcon="@mipmap/ic_launcher_round"
        android:supportsRtl="true"
        android:theme="@style/Theme.TLottoSimulator"
        tools:targetApi="31">

        <!--
             You can find your app ID in the AdMob UI. For android:value,
            insert your own AdMob app ID in quotes, as shown below.
            Sample AdMob App ID: ca-app-pub-3940256099942544~3347511713
        -->
        <meta-data
            android:name="com.google.android.gms.ads.APPLICATION_ID"
            android:value="광고 추가후 나온 1번 앱 아이디" />

        <activity
            android:name=".MainActivity"
            android:exported="true">
            <intent-filter>
                <action android:name="android.intent.action.MAIN" />

                <category android:name="android.intent.category.LAUNCHER" />
            </intent-filter>
        </activity>
    </application>

</manifest>3. 애드몹 영역 추가 및 설정
이제 앱에 애드몹을 추가 해 보자
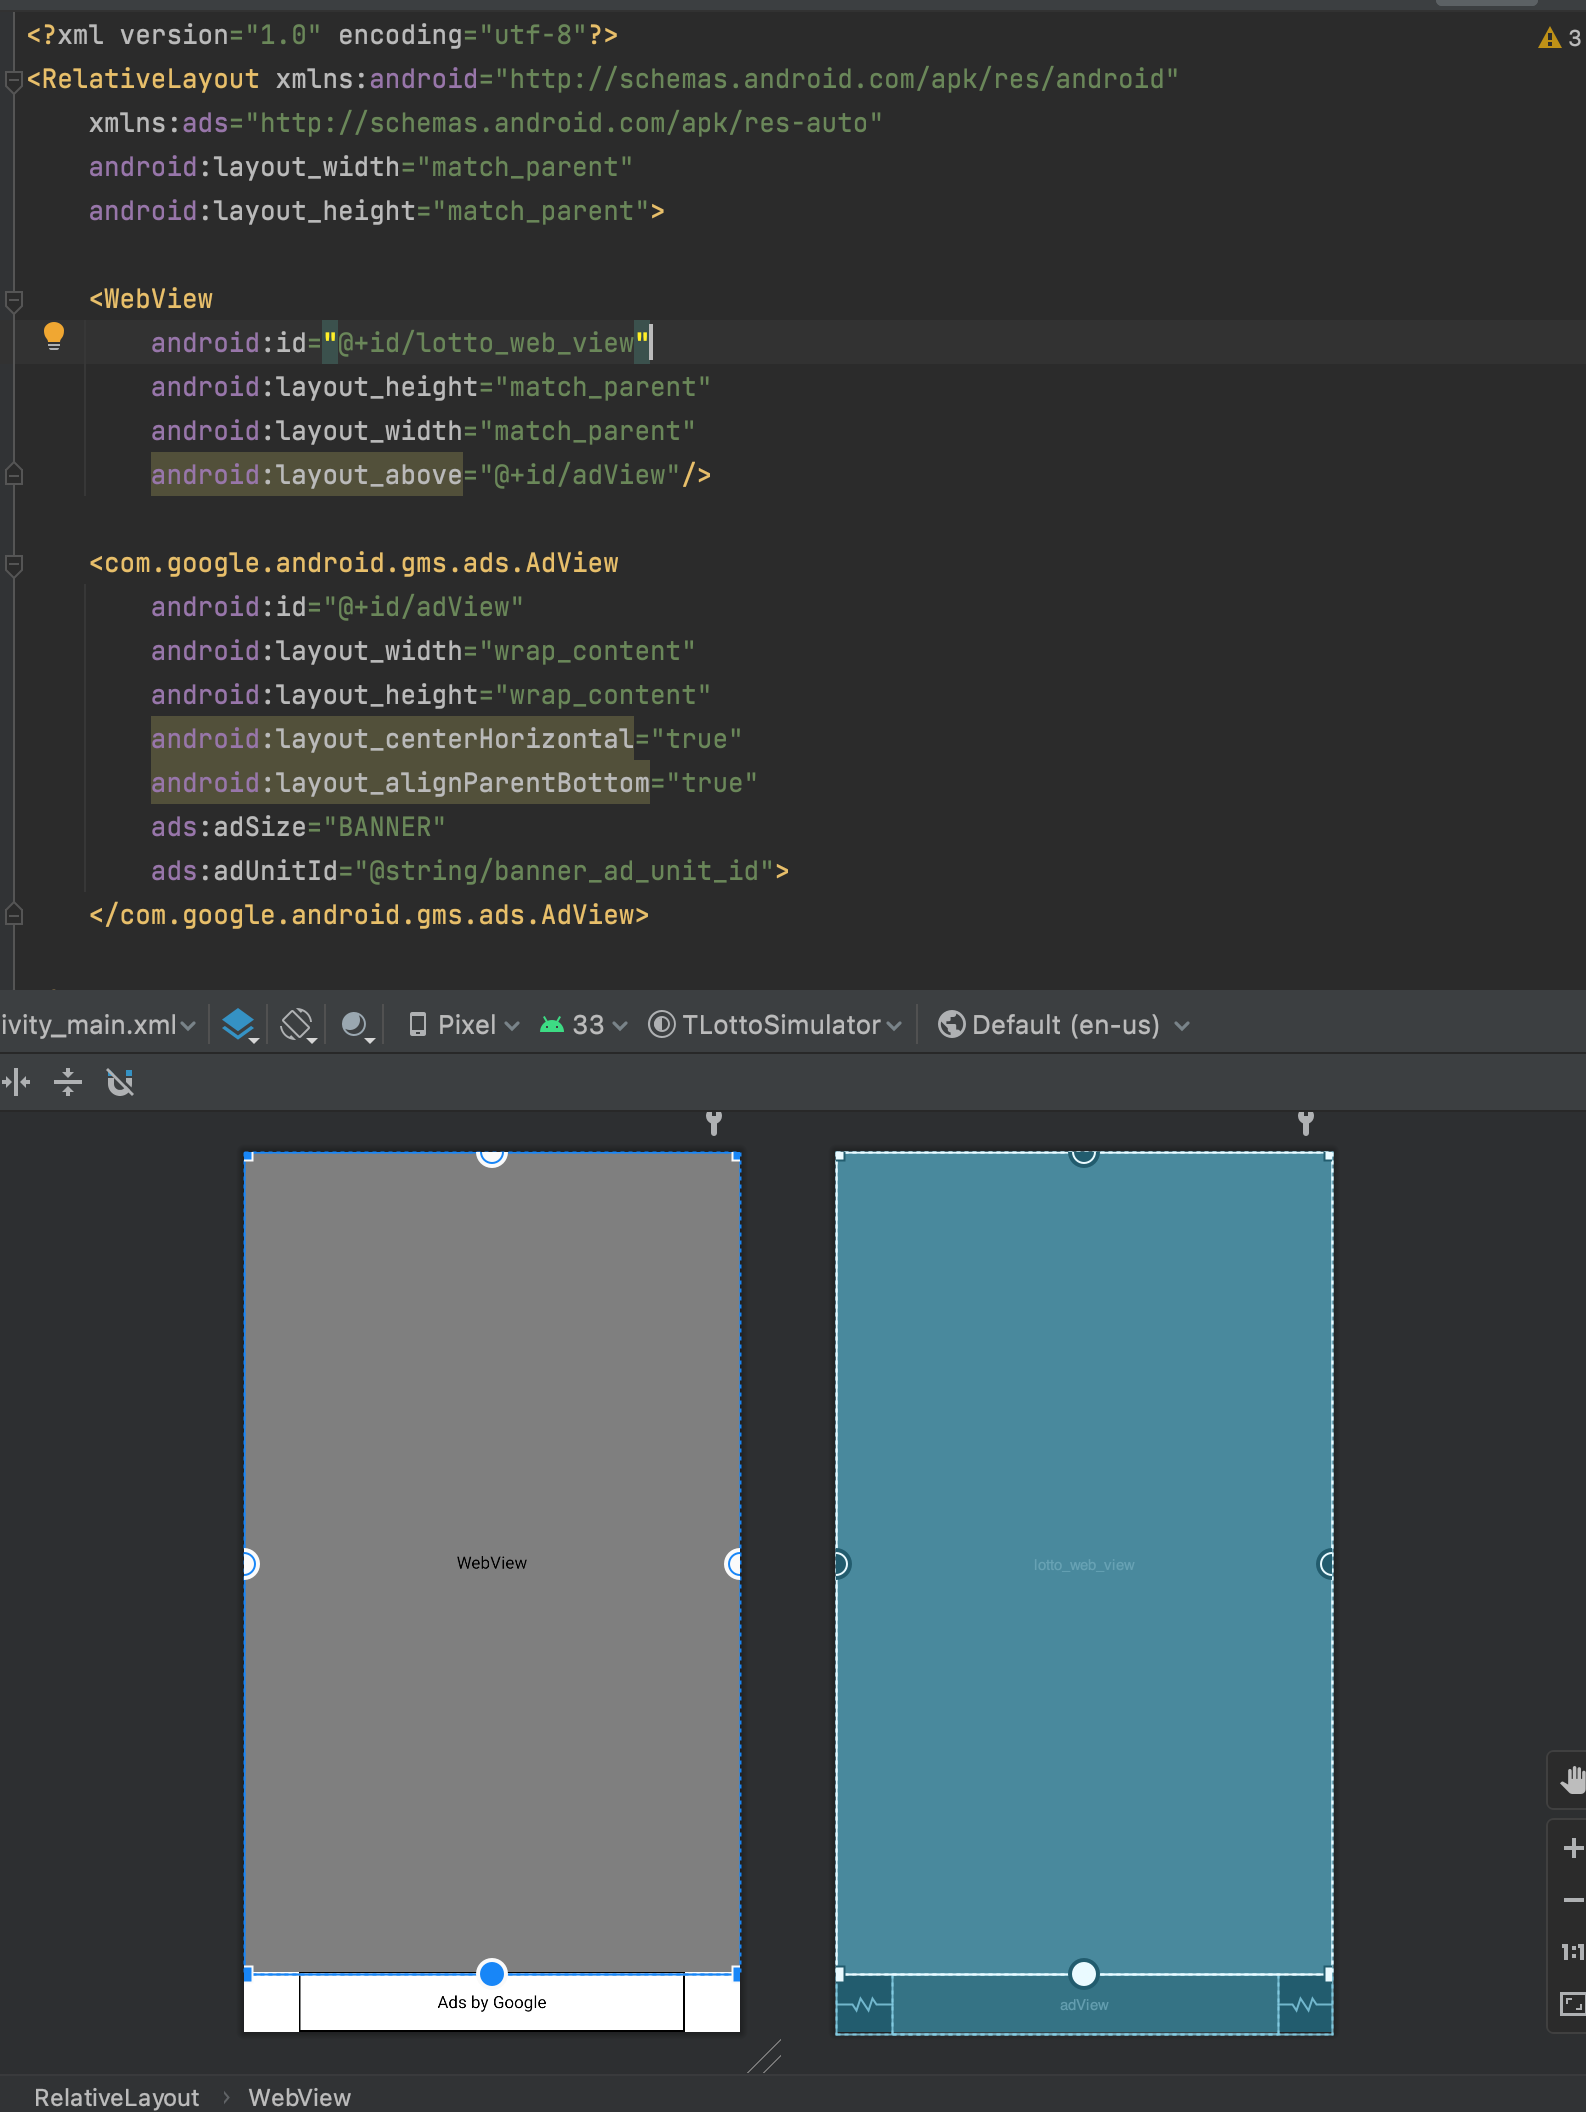
먼저 layout 폴더의 activity_main.xml을 아래 처럼 수정한다.
- activity_main.xml 수정
RelativeLayout으로 변경 하였고 WebView아래 AdView가 추가 되었다.
<?xml version="1.0" encoding="utf-8"?>
<RelativeLayout xmlns:android="http://schemas.android.com/apk/res/android"
    xmlns:ads="http://schemas.android.com/apk/res-auto"
    android:layout_width="match_parent"
    android:layout_height="match_parent">

    <WebView
        android:id="@+id/lotto_web_view"
        android:layout_height="match_parent"
        android:layout_width="match_parent"
        android:layout_above="@+id/adView"/>

    <com.google.android.gms.ads.AdView
        android:id="@+id/adView"
        android:layout_width="wrap_content"
        android:layout_height="wrap_content"
        android:layout_centerHorizontal="true"
        android:layout_alignParentBottom="true"
        ads:adSize="BANNER"
        ads:adUnitId="광고 추가후 나온 두번째 광고아이디 추가">
    </com.google.android.gms.ads.AdView>

</RelativeLayout>
정상적으로 수정이 되었으면 아래 처럼 애드몹 영역 위에 웹뷰가 올라간 상태로 보인다.
- MainActivity수정
다음은 MainActivity를 수정해 준다.
아래 소스가 추가되어야 하는데
private AdView mAdView;

mAdView = findViewById(R.id.adView);
AdRequest adRequest = new AdRequest.Builder().build();
mAdView.loadAd(adRequest);
아래 완성 소스를 보고 적절히 위치를 추가해 준다.
import androidx.appcompat.app.AppCompatActivity;

import android.os.Bundle;
import android.webkit.WebView;

import com.google.android.gms.ads.AdRequest;
import com.google.android.gms.ads.AdView;

public class MainActivity extends AppCompatActivity {

    private WebView lottoWebView;
    private static final String TAG = "MainActivity";
    private AdView mAdView;

    @Override
    protected void onCreate(Bundle savedInstanceState) {
        super.onCreate(savedInstanceState);

        setContentView(R.layout.activity_main);

        lottoWebView = findViewById(R.id.lotto_web_view);
        lottoWebView.loadUrl("file:///android_asset/index.html");

        mAdView = findViewById(R.id.adView);
        AdRequest adRequest = new AdRequest.Builder().build();
        mAdView.loadAd(adRequest);
    }
}
4. 앱 실행
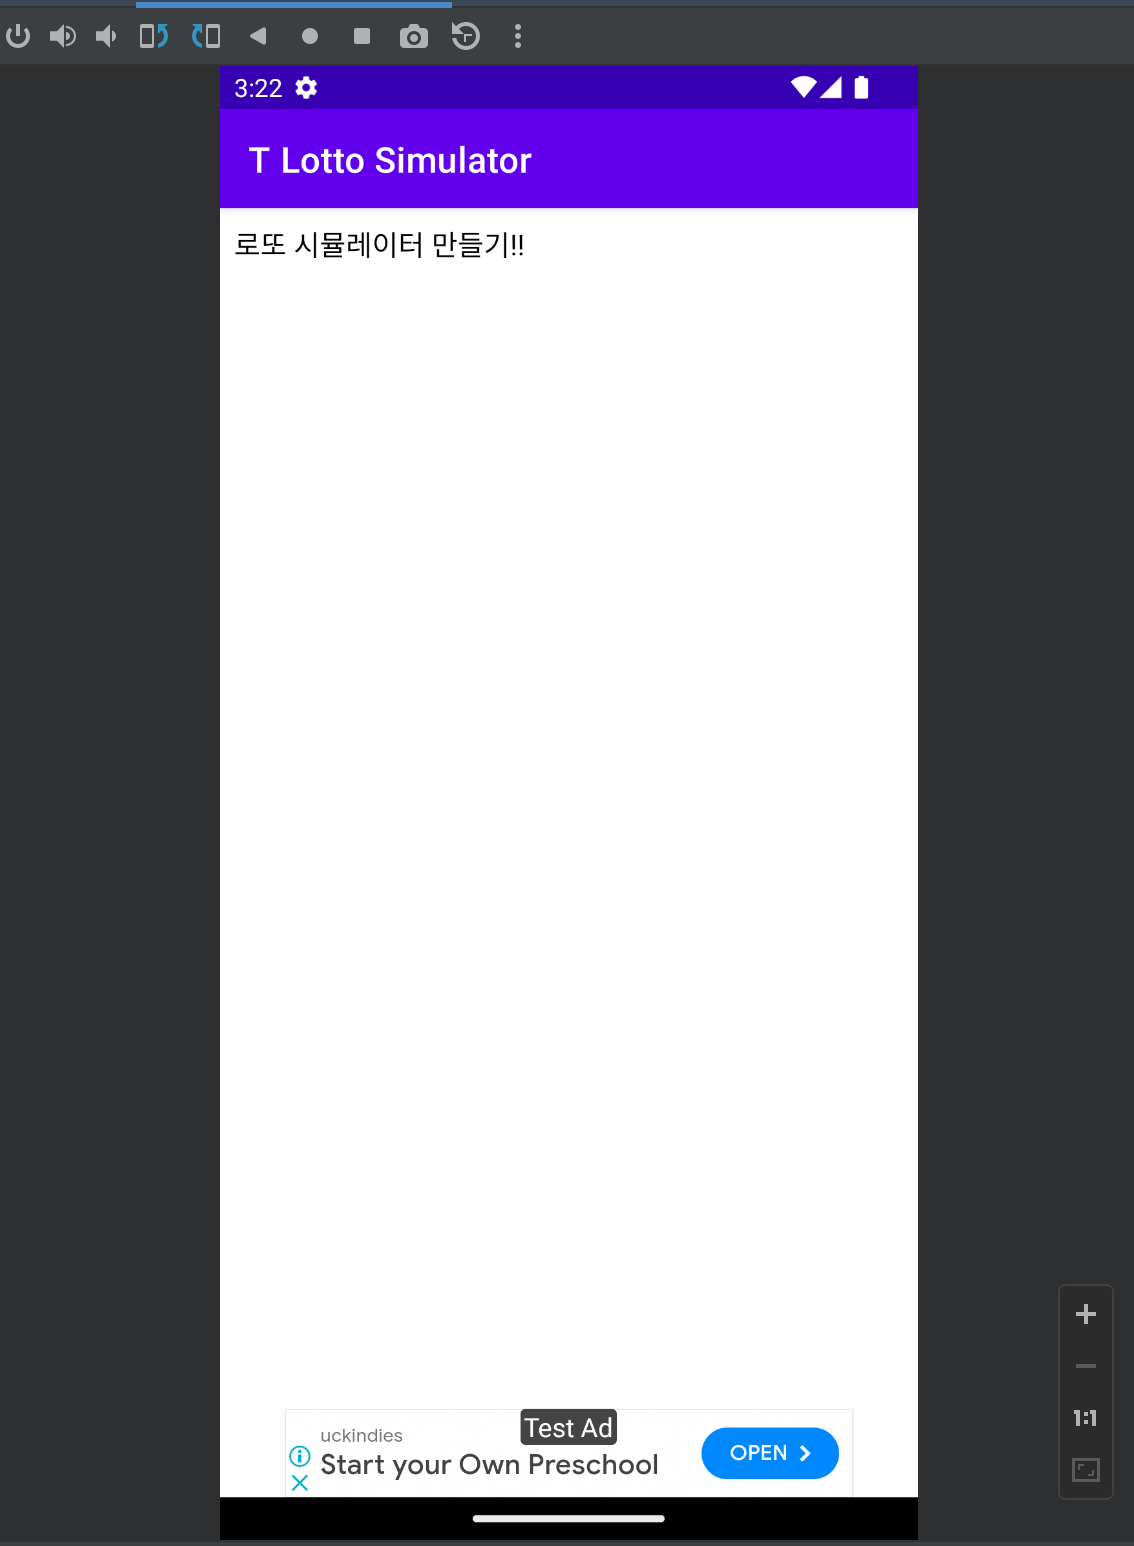
이제 앱을 실행해 보면 하단에 애드몹 배너가 나오는것을 볼 수 있다.
본 포스트 내용을 동영상으로 따라하고 싶으신 분들은 아래 포스팅을 참조
https://appmoney.tistory.com/9
07. 동영상으로 따라하기 - 2.
지난 포스팅으로 작성했던 애드몹 연동하기의 동영상 버전 https://appmoney.tistory.com/7 05. 애드몹 연동하기 이제 지난번에 만든 기본 화면에 애드몹을 연동 하여 하단 배너광고를 노출해 보자 1. 애
appmoney.tistory.com
'취미 앱 개발 > 닥치고 앱 개발' 카테고리의 다른 글
| 07. 동영상으로 따라하기 - 2. (0) | 2023.11.28 |
|---|---|
| 06. 동영상으로 따라하기. (0) | 2023.11.27 |
| 04. 프로젝트 만들기 + 기본 화면 띄어보기 (1) | 2023.11.25 |
| 03. 주제 + 기능 정하기 (0) | 2023.11.24 |
| 02. 닥치고 앱 개발(준비하기) (0) | 2019.12.30 |